How to Dye Leather Handbag
Dyeing your leather handbag is a rewarding way to refresh its appearance. Initially, identify the leather type for ideal dye results. Choose water-based dyes for ease of use, and don't skip a patch test to avoid surprises. Gather your tools—gloves, brushes, and covering cloths. Clean your handbag with mild soap, dry thoroughly, and shield non-dye areas with tape. Apply dye with a soft rag, using circular motions, and let each layer dry completely. Afterward, let your handbag cure for 24 hours and finish with a sealant for durability. There's more to enhancing your handbag's new lively look.
Understanding Leather Types
When you're preparing to dye a leather handbag, understanding the different types of leather is essential. The type of leather you choose directly impacts the dyeing process and the final look of your leather goods. Full-grain leather, known for its durability and natural markings, is the highest quality leather. However, it's the most resistant to dye absorption, so achieving a vivid color can be challenging. Despite this, its natural texture can add character to your handbag.
On the other hand, top-grain leather has been sanded for a more uniform appearance. It's less durable than full-grain but still offers good results when dyed, making it a popular choice for achieving a consistent finish. Genuine leather, crafted from leftover parts, is a more economical option but may not produce as bright a dye outcome as higher-quality leathers due to its makeup.
Lastly, bonded leather, made from reconstituted scraps, is the lowest quality. Its tendency to hold dye unevenly often results in a patchy color application. Recognizing these characteristics helps you tailor the dyeing process to achieve your desired dyeing outcome, ensuring your handbag looks its best.
Choosing the Right Dye
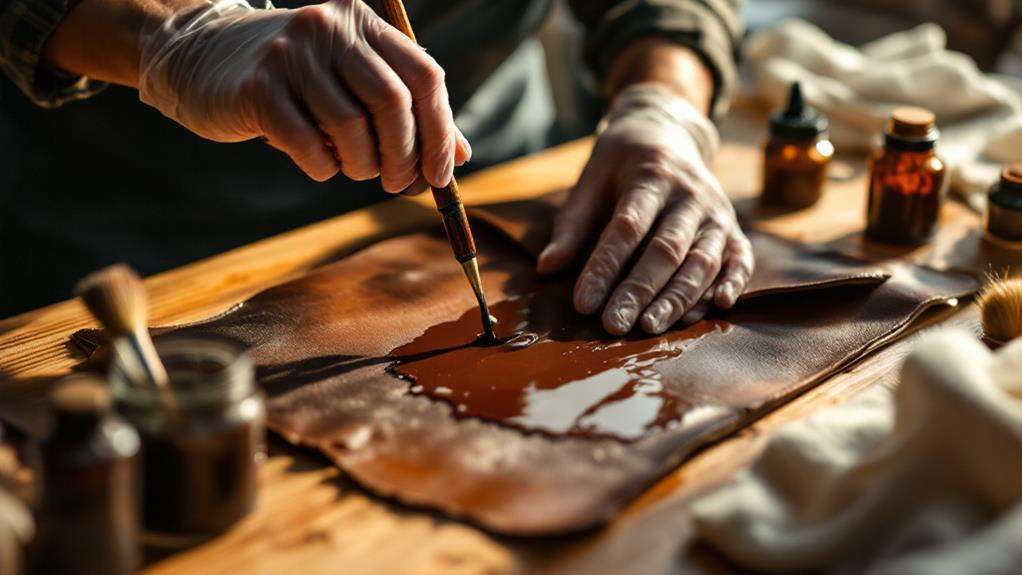
Selecting the perfect dye for your leather handbag is a blend of art and science. You'll want to start by considering water-based dyes, especially if you're a beginner. They're easy to use and generally safer for indoor application. Also, check that the dye is compatible with the type of leather you have. Full-grain and top-grain leathers absorb dyes differently than genuine or bonded leather, affecting the final color outcome. Popular brands like Fiebings and Angelus offer a wide range of colors and finishes, catering to different preferences.
Before you commit to a full application, always conduct a patch test. Apply a small amount of dye to an inconspicuous area of your handbag. This step will help you assess both the color outcome and if the dye is compatible with your leather. It's essential to avoid surprises after the dye has fully set.
Essential Tools and Safety
After choosing the right dye, it's imperative to focus on the tools and safety measures needed for the dyeing process. To start, gather fundamental tools like leather dye, application brushes or sponges, and a leather cleaner. You'll also need protective gloves and safety goggles to shield your skin and eyes from potential irritation caused by the dye chemicals. Confirm you have soft cotton rags and a clean cloth to wipe excess dye and maintain the condition of your high-quality leather.
Prepare your workspace to protect surfaces from stains. Cover the area with newspaper or a cloth, providing a clean and organized environment. Ventilation is significant, so make certain there's good airflow to avoid inhaling harmful fumes. Before diving into the full application, always test the leather dye on a small, inconspicuous test piece of leather. This will help you assess color compatibility and verify it reacts well with the material.
Here's what you need:
- Protective gear: rubber gloves and safety goggles
- Application tools: brushes or sponges
- Workspace necessities: newspaper or cloth to protect surfaces
Preparing the Handbag
Before you start dyeing your leather handbag, it's crucial to prepare the surface properly for the best results. Begin by cleaning the handbag with a soft cloth and mild soap. This step removes dust, dirt, and oils, guaranteeing the leather is free from contaminants before you apply the leather dye. Once the surface is clean, use tape to cover any hardware or areas you don't want to dye, protecting them from accidental discoloration.
Next, focus on hydrating the leather. Apply a light coat of olive or jojoba oil using circular motions. This helps the leather stay supple and allows for better dye penetration. Confirm the handbag is completely dry after cleaning and hydrating, as moisture can affect the dye's adherence and final color.
While preparing, work in a well-ventilated area. This guarantees you're safe from any fumes during the process. Gather all necessary materials, including the leather dye and application tools, to streamline your preparation. By following these steps, you'll set the stage for a successful dyeing experience, guaranteeing your handbag takes on the new color beautifully and evenly.
Dyeing Process Steps
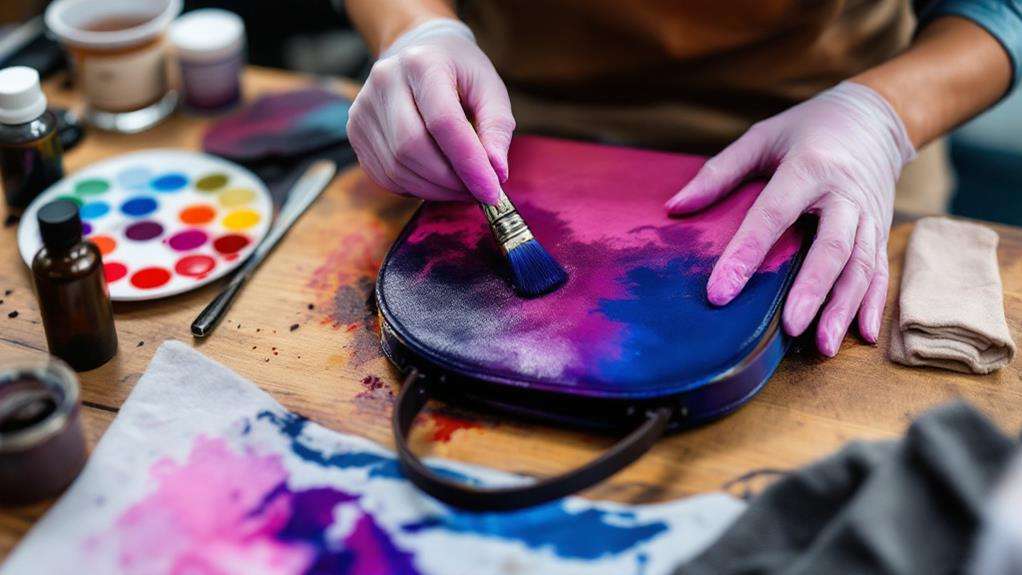
Starting the dyeing process involves a few careful steps to guarantee your leather handbag achieves a lively and even color. Begin by thoroughly cleaning your handbag with a clean cloth and mild soap to remove any dust and oils. Once it's spotless, let it air dry completely. Prepare your dye by diluting it to the desired intensity, ensuring you won't end up with a blotchy finish.
When you're ready to apply the dye, use a soft cotton rag to apply the initial coat in gentle circular motions. This technique helps achieve even coverage. After the initial coat, let the dye dry completely before adding more layers. Repeat until you reach your desired color.
- Carefully wipe the handbag with a clean cloth to remove any debris.
- Use circular motions to apply the dye evenly.
- Allow each layer of dye to dry before applying the next.
Once satisfied with the color, apply a wax-based leather conditioner in circular motions to rehydrate the material. Make sure to allow the conditioner to dry. Afterward, seal the dye with a protective finish, ensuring your handbag's color remains bright and durable.
Post-Dye Care Tips
Maintaining your leather handbag's lively new color requires proper post-dye care. After dyeing leather, allow your handbag to cure for at least 24 hours. This guarantees the dye sets properly, giving your bag that lively finish you desire. Once cured, apply a protective finish or sealant. This step improves the handbag's durability and helps prevent fading or discoloration over time.
Regular maintenance is key to preserving your handbag's beauty. Regularly condition the leather using a wax-based conditioner. This will keep the leather supple and prevent dryness, which can occur after dyeing. Conditioning is vital for hydrating the leather and maintaining its softness and flexibility.
Cleaning your handbag with the right leather cleaners is important. Avoid harsh chemicals that could damage the leather or alter the color. Instead, opt for cleaners specifically designed for leather to maintain the dyed color's appearance.